Bu yazıda bir web yaratıyoruz ve onu Jetty üzerinde çalıştırıyoruz. Eclipse editörü ile yapacağız geliştirmeyi.
Öncelikle Eclipse'e Jetty plugin'i kuralım. Help menüsünden Eclipse Marketplace'i açalım. Jetty ile aratırsak Eclipce Jetty 5.0.0 (veya yeni bir versiyon) plugin'i gelecektir :
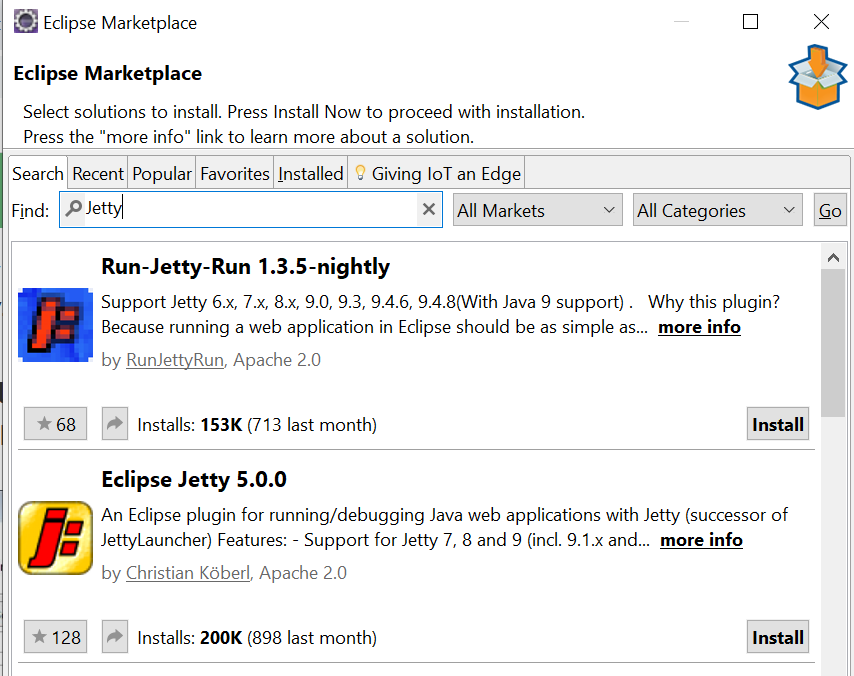
Bu plugin'i kurup ve eclipse'i restart edelim.
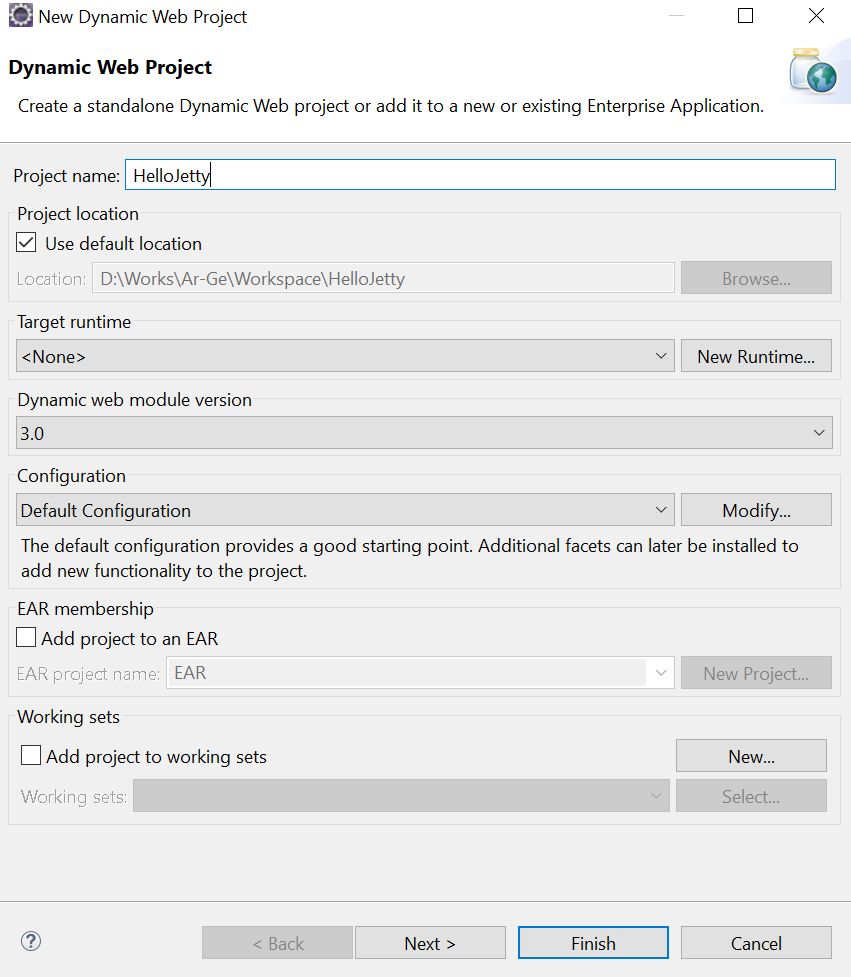
Bir Dynamic Web Project yaratalım ve adına HelloJetty diyelim :
Projenin hemen içinde
<!DOCTYPE html>
<html>
   <head>
      <meta charset="ISO-8859-9">
      <title>Merhaba Jetty</title>
   </head>
   <body>Merhaba Jetty!</body>
</html>
şeklinde bir index.html yaratalım. web.xml de welcome-file-list de index.html olmalı :
<welcome-file-list>
<welcome-file>index.html</welcome-file>
<welcome-file>index.htm</welcome-file>
<welcome-file>index.jsp</welcome-file>
<welcome-file>default.html</welcome-file>
<welcome-file>default.htm</welcome-file>
<welcome-file>default.jsp</welcome-file>
</welcome-file-list>
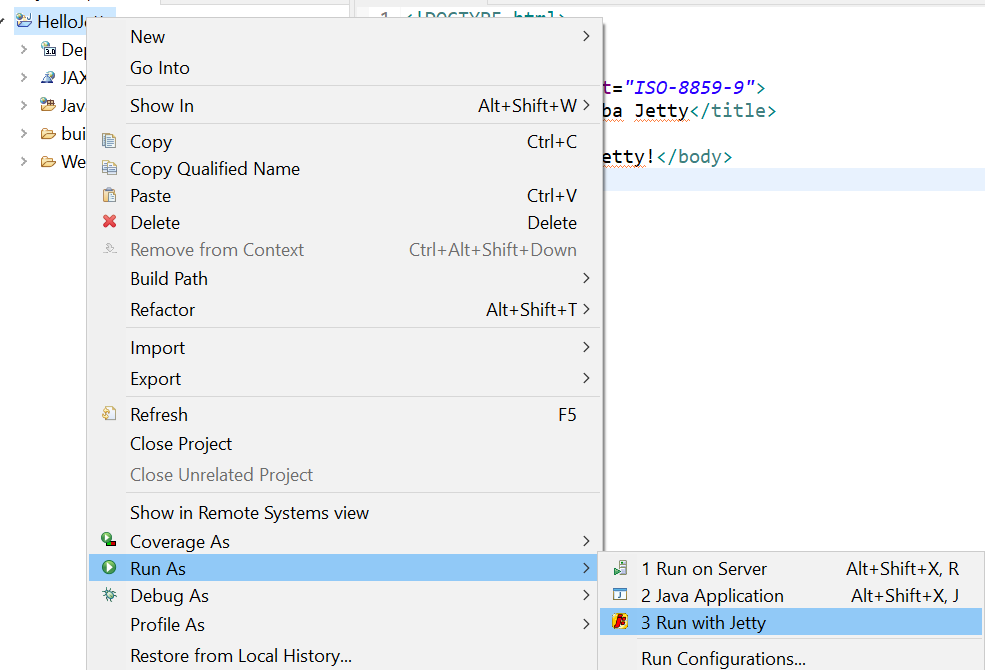
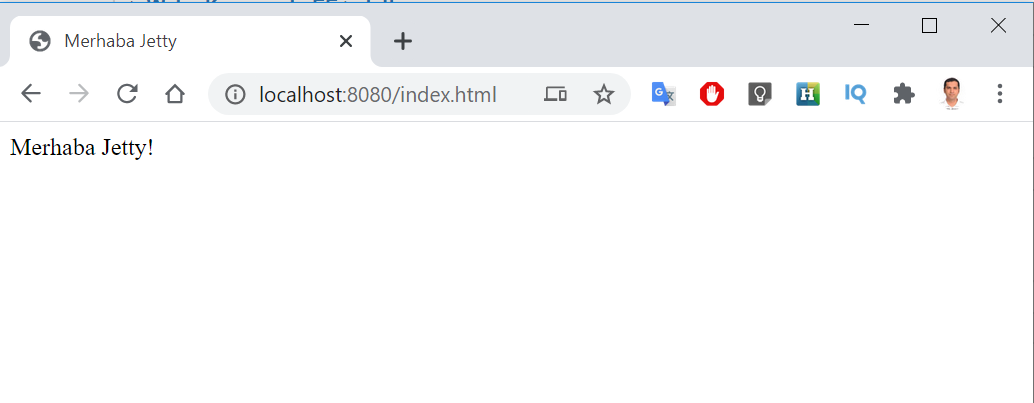
Bu projeyi Jetty ile çalıştıralım.
Console da aşağıdaki gibi output görmeniz gerekir :
2020-07-02 13:55:26.666:INFO::main: Logging initialized @281ms
   Configuration: D:\Users\zteker\AppData\Local\Temp\eclipseJettyPlugin.config.HelloJetty.xml
         Version: 9.3.25.v20180904
         Context: /
            Port: 8080
       Classpath: D:/Works/Ar-Ge/Workspace/HelloJetty/build/classes
2020-07-02 13:55:27.043:INFO:oejs.Server:main: jetty-9.3.25.v20180904, build timestamp: 2018-09-05T00:11:46+03:00, git hash: 3ce520221d0240229c862b122d2b06c12a625732
2020-07-02 13:55:27.295:INFO:oeja.AnnotationConfiguration:main: Scanning elapsed time=1ms
2020-07-02 13:55:27.328:WARN:oejs.SecurityHandler:main: ServletContext@o.e.j.w.WebAppContext@7a187f14{/,file:///D:/Works/Ar-Ge/Workspace/HelloJetty/WebContent/,STARTING}{D:\Works\Ar-Ge\Workspace\HelloJetty\WebContent} has uncovered http methods for path: /
2020-07-02 13:55:27.347:INFO:oejsh.ContextHandler:main: Started o.e.j.w.WebAppContext@7a187f14{/,file:///D:/Works/Ar-Ge/Workspace/HelloJetty/WebContent/,AVAILABLE}{D:\Works\Ar-Ge\Workspace\HelloJetty\WebContent}
2020-07-02 13:55:27.364:INFO:oejs.AbstractConnector:main: Started ServerConnector@74a10858{HTTP/1.1,[http/1.1]}{0.0.0.0:8080}
2020-07-02 13:55:27.364:INFO:oejs.Server:main: Started @983ms
Jetty startup finished in 0,788 s.
Used memory: 5,4 MB of 243,5 MB (3,5 GB maximum)
Console available: type "help".
Run konfigürasyonunu kontrol ederseniz şu şekilde bir şekilde göreceksiniz :
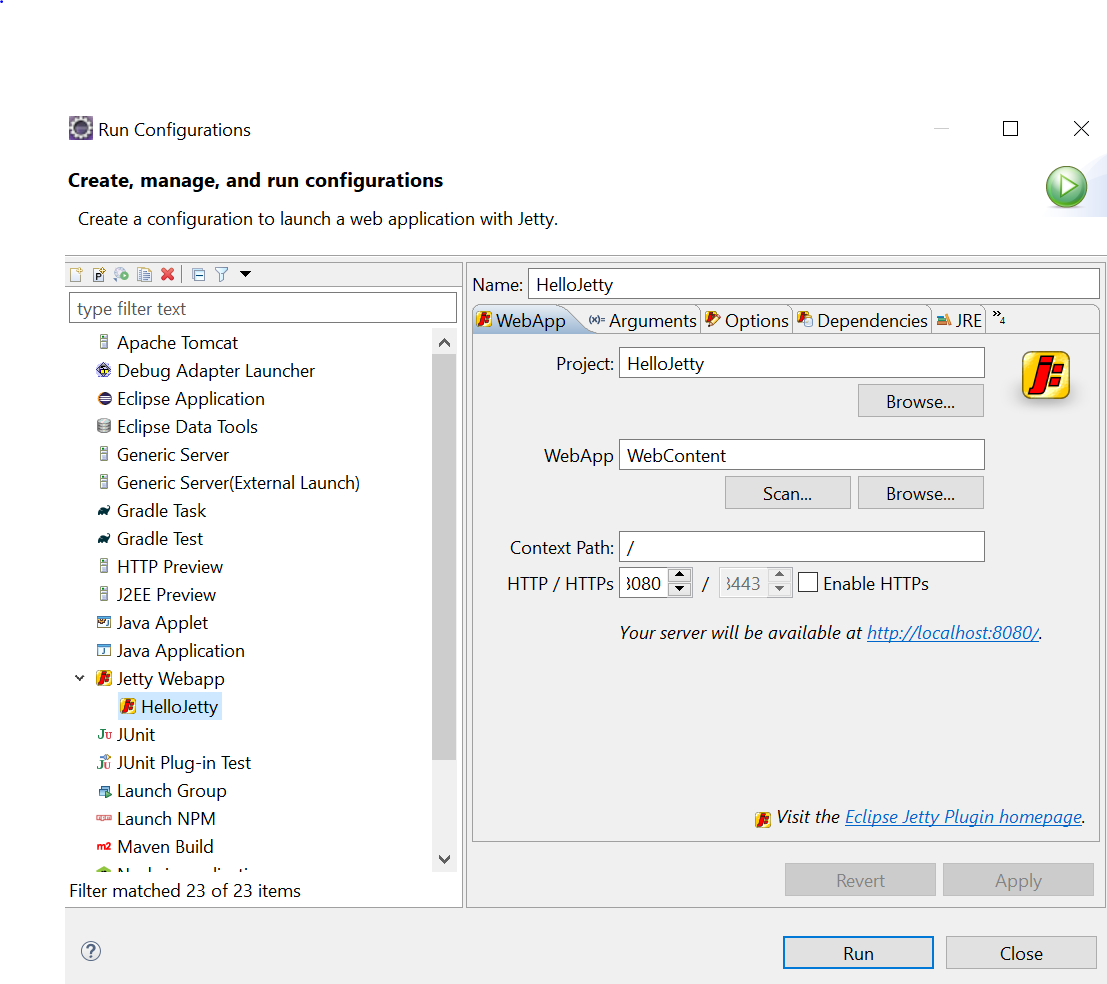
Görüldüğü gibi content path değeri olarak / almış. Bu nedenle doğrudan http://localhost:8080 yazarsanız HelloJetty çalışacaktır :
Görüldüğü gibi Jetty plug-in kullanarak herhangi bir web server'a ihtiyacınız olmadan web projelerinizi çalıştırabilirsiniz.
Kaynak :
www.baeldung.com/jetty-eclipse
jetty-runner projesi ile bir Web uygulamasını .war paketinden çalıştırabilirsiniz.
Bunun için
repo1.maven.org/maven2/org/eclipse/jetty/jetty-runner/9.0.0.M4 adresinden jetty-runner-xx.jar ı indirmek gerekiyor.
İndirdiğiniz jar'ı ve çalıştırmak istediğiniz web projesinin .war dosyasını bir klasöre koyalım. Aşağıdaki gibi çalıştıralım :
D:\Works\Ar-Ge\Jetty>java -jar jetty-runner-9.0.0.M4.jar HelloJetty.war
2020-07-02 17:55:00.661:INFO:oejr.Runner:main: Runner
2020-07-02 17:55:00.729:INFO:oejs.Server:main: jetty-9.0.0.M4
2020-07-02 17:55:00.755:INFO:oejw.WebInfConfiguration:main: Extract jar:file:/D:/Works/Ar-Ge/Jetty/HelloJetty.war!/ to D:\Users\zteker\AppData\Local\Temp\jetty-0.0.0.0-8080-HelloJetty.war-_-any-\webapp
2020-07-02 17:55:00.941:INFO:oejpw.PlusConfiguration:main: No Transaction manager found - if your webapp requires one, please configure one.
2020-07-02 17:55:01.537:INFO:oejsh.ContextHandler:main: started o.e.j.w.WebAppContext@3f102e87{/,file:/D:/Users/zteker/AppData/Local/Temp/jetty-0.0.0.0-8080-HelloJetty.war-_-any-/webapp/,AVAILABLE}{file:/D:/Works/Ar-Ge/Jetty/HelloJetty.war}
2020-07-02 17:55:01.726:INFO:oejs.ServerConnector:main: Started ServerConnector@a22cb6a{HTTP/1.1}{0.0.0.0:8080}
jetty-runner-9.0.0.M4.jar ile HelloJetty.war aynı dizindedir. Artık projeniz çalışabilir
Görüldüğü gibi jetty-runner bir web projesini, war dosyasını kullanarak komut satırından kolayca çalıştırılabilmektedir.
Bu projede JSF 2.2 web uygulaması yaratıyoruz. Bu uygulamayı Eclipse Jetty plugin ile çalıştırıyoruz. (Eclipse Jetty plugin ile bir web projesi örneğine
www.fibiler.com/Jetty-ile-Eclipse-Uzerinde-Web-Uygulamasi-Gelistirme_Ipucu_147334 sayfasından bakabilirsiniz.)
Öncelikle JSF ile ilgili bağlantıları pom.xml e ekliyoruz :
<dependency>
	<groupId>javax.servlet</groupId>
	<artifactId>javax.servlet-api</artifactId>
	<version>3.1.0</version>
</dependency>
<dependency>
	<groupId>com.sun.faces</groupId>
	<artifactId>jsf-api</artifactId>
	<version>2.2.20</version>
</dependency>
<dependency>
	<groupId>com.sun.faces</groupId>
	<artifactId>jsf-impl</artifactId>
	<version>2.2.20</version>
</dependency>
web.xml aşağıdaki gibi :
<web-app xmlns:xsi="http://www.w3.org/2001/XMLSchema-instance" xmlns="http://java.sun.com/xml/ns/javaee" xsi:schemaLocation="http://java.sun.com/xml/ns/javaee http://java.sun.com/xml/ns/javaee/web-app_3_0.xsd" id="WebApp_ID" version="3.0">
  <display-name>HelloJSF2_2</display-name>
  <welcome-file-list>
    <welcome-file>index.html</welcome-file>
    <welcome-file>index.htm</welcome-file>
    <welcome-file>index.xhtml</welcome-file>
    <welcome-file>index.jsp</welcome-file>
    <welcome-file>default.html</welcome-file>
    <welcome-file>default.htm</welcome-file>
    <welcome-file>default.jsp</welcome-file>
  </welcome-file-list>
  <servlet>
    <servlet-name>Faces Servlet</servlet-name>
    <servlet-class>javax.faces.webapp.FacesServlet</servlet-class>
    <load-on-startup>1</load-on-startup>
  </servlet>
  <servlet-mapping>
    <servlet-name>Faces Servlet</servlet-name>
    <url-pattern>*.xhtml</url-pattern>
  </servlet-mapping>
</web-app>
Aşağıdaki gibi örnek bir index.xhtml sayfası yaratalım ve hemen ana dizine koyalım :
<!DOCTYPE html>
<html xmlns="http://www.w3.org/1999/xhtml"
      xmlns:f="http://java.sun.com/jsf/core"
      xmlns:h="http://java.sun.com/jsf/html">
   <head>
      <meta charset="ISO-8859-9"/>
      <title>Merhaba JSF 2.2</title>
   </head>
   <body>
   		<h:outputText value="Merhaba JSF 2.2"></h:outputText>
   </body>
</html>
Proje üzerinde sağ tıklayıp Run As - Run with Jetty ile çalıştırılır. Artık localhost:8080 yazıldığında index.xhtml sayfası görülecektir.
Bu yazıda basit Java Web projesi yaratıyoruz ve onu jetty-maven-plugin kullanarak Eclipse üzerinde çalıştırıyoruz.
Bunun için öncelikle aşağıdaki bağımlılığı ekliyoruz :
<dependency>
	<groupId>javax.servlet</groupId>
	<artifactId>javax.servlet-api</artifactId>
	<version>3.1.0</version>
	<scope>provided</scope>
</dependency>
Ardında maven plugin'ini ekliyoruz :
<plugin>
	<groupId>org.eclipse.jetty</groupId>
	<artifactId>jetty-maven-plugin</artifactId>
	<version>9.4.30.v20200611</version>
	<configuration>
		<webAppSourceDirectory>${project.basedir}/WebContent</webAppSourceDirectory>
		<scanIntervalSeconds>10</scanIntervalSeconds>
		<webApp>
			<contextPath>/HelloJettyMavenPlugin</contextPath>
		</webApp>
	</configuration>
</plugin>
webAppSourceDirectory özelliği ile ana web içeriğin yerini söylüyoruz. Standart bir Maven Web projesinde bunu eklemenize gerek yok. Ancak Eclipse ile bir web projesi yaratırsanız bu tür farklılıklar oluşabilir.
Aşağıdaki sayfayı da WebContent içine ekleyelim :
<!DOCTYPE html>
<html>
   <head>
      <meta charset="ISO-8859-9">
      <title>Merhaba Jetty</title>
   </head>
   <body>Merhaba Jetty!</body>
</html>
Projeyi jetty:run Maven komutuyla çalıştırırsanız Jetty başlatılacak ve web projesi içine koyulacaktır. Ardından http://localhost:8080/HelloJettyMavenPlugin/ şeklinde çağırdığınızda Merhaba Jetty! yazısını göreceksiniz.
Bu kaynaktan yararlanılmıştır :
o7planning.org/en/10335/run-maven-java-web-application-in-jetty-maven-plugin